4 Proven Ways to Get Your Art Noticed FAST!
In a perfect world, every talented artist would have a huge audience.
Unfortunately, we don’t live in a perfect world. Our world is so imperfect that perfect artists struggle to get eyeballs on their artwork and people throw the cliché of the starving artist around casually.
Frankly, if you don’t want to become a starving artist, you must get people to notice your art, and fast. I get that marketing isn’t one of your strongholds, but unless you’re willing to pay someone else to market you, you must do it yourself.
I know it would be cruel to let you do all the work, so I figured it would help if I showed you some of the proven ways that most popular artists use to get their art noticed in a world overflowing with artists. Here are some of the ways to get instant attention to your art.
1. Create a Professional Art Website

(This article may contain affiliate links and I may earn a commission if you make a purchase)
I can bet my last dollar that this isn’t the first time you’ll hear this advice, but I doubt you ever acted on it. Unless you’re creating art for fun and Instagram likes, you certainly do need a website and a professionally designed one at that.
Whether you’re looking to build connections with other artists or you’re applying for an exhibition or competition, most people will naturally expect you to have a unique web address as your portfolio, as opposed to giving an Instagram handle when someone asks to see your portfolio.
In the past, you’d need to pay a professional programmer that specializes in web design and development to have a website decent enough to present as your online portfolio. Fast forward to today, the advent of low-code website builders has made it possible to create your website without necessarily hiring a developer.
Your website doesn’t have to be necessarily complicated, but it must be updated frequently to show your latest artwork as well as highlight your best work overall.
If you don’t know how to go about creating a website, here are some tips to get you started.
Buy a unique domain name (and a hosting, maybe).
There are some prerequisites to setting up your unique artist website, but one of the most important is getting a unique domain name. Depending on the website builder that you intend to use, this step may not be necessary, but it’s highly recommended to make your website recognizable.
A domain name is the identity of your website on the web. It usually reads something similar to yourwebadress.com, and is very cheap; you can get a domain name for about $10 on a domain registrar like Namecheap or Godaddy.
Depending on what website builder you’ll be using, you may also need to buy a hosting plan. Website builders like Squarespace or Weebly don’t require you to have separate hosting, but a CMS like WordPress does.
If you’re hoping to host your website on WordPress, you can always get a domain name and a hosting plan bundle, and you’ll probably get a discount if you buy it together that way.
Select a (free) website builder.
After buying your unique domain name, you can select the website builder that you want to use in building your website. The most popular one out there is WordPress. Using WordPress is a no-brainer if you’re a bit tech-savvy and you want absolute control over your website.
If you don’t like messing up with stuff on the internet, you can safely go for Squarespace. Squarespace won’t give you as much level of control as WordPress does, but it’s easy to use and makes it hard to mess anything up.
Design your art website.
You’re certainly not the first artist to create a website. Many others have done it before you, and some are kind enough to document the processes they followed to create the website.
Once you have your website up and running on the custom domain you bought earlier, you can ask for YouTube’s help on how to build a portfolio website for an artist. You should see hundreds of tutorials by beautiful artists, showing you a step-by-step process you can follow to design your website.
If you’re using Squarespace, you’ll be able to find many video tutorials like the one above to help you on your way. For WordPress, however, you may have to buy a plugin called Elementor to design your website. It makes designs as easy as dragging and dropping stuff, and it’s a really helpful tool for beginners.
If you don’t have the time to design your website on your own, you can hire a freelancer to do it for you in weeks. Many freelancers are willing to help you design your website to your taste for a few bucks on freelancing sites like Fiverr or Upwork.
Create the necessary pages.
Regardless of how you chose to go about your website’s design, there are some indispensable pages that you cannot hire a freelancer to create for you: the about page, and the artist statement page.
Your about page tells your visitor about you, the artist behind the artworks on the page, and the artist statement explains the motivations behind your art. It shows a visitor what your art signifies, your art style; in short, it’s representative of your entire brand as an artist.
Before hitting publish on both of these pages, check out what other artists are doing with their pages. Make it artsy, interesting, and easy to read, but more importantly, make it professional.
Showcase your artworks
After creating all the necessary pages on your website, there’s one last thing that must be done before you finally publish it to the world, and that’s listing your artworks on the page. If you don’t have digital copies of most of your artworks, you aren’t truly ready to create a website.
Hire a photographer or get your hands on a DSLR and try to make accurate digital representations of your artworks. Retouch the produced images on a good photo editing software like Adobe Photoshop and upload all of these photos to your website.
It’s always advisable to take inspiration from what others are doing with their portfolio websites. Check out other authors and see how they are showcasing their artworks.
It’s recommended to curate your best artworks to display on your website’s front page. Welcoming visitors with too many images of your art can be overwhelming, leading to the user ignoring all of the welcoming artworks.
By following all of these guidelines to creating a catchy portfolio website for your art, you should have more success with applications in your art career, as dropping a website URL will be seen as a more professional move than linking them to your Reddit account.
2. Set Up Your Instagram for Selling Your Art
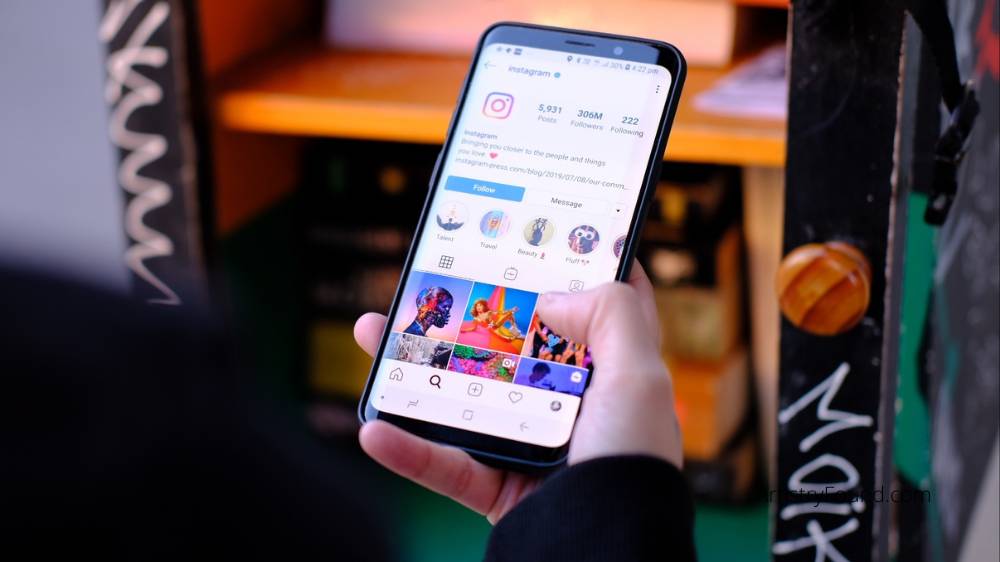
If I say all artists are on Instagram, it would be hard to disprove my claim. Convincing someone that all artists are on Instagram is much easier than convincing me that you’re an artist without an Instagram account.
However, there’s a common problem with the way artists use Instagram. As an artist, you’re one of the major creators on Instagram and you shouldn’t use the platform as haphazardly as everyone else uses it. You must optimize your Instagram account to show that you mean business.
Most artists will be willing to optimize their Instagram accounts for more traction and like if they only knew how. With years of experience promoting art on Instagram, here are some tips to help you gain Instagram stardom in no time.
Create an Instagram business account.
One of the rookie mistakes some artists make while setting up their Instagram profile is creating a regular personal account when they have something to promote. If you’re willing to get more eyes on your artwork and get more sales, you are a business and you should get a business account.
Fortunately, you can easily convert a personal Instagram account to a business account by following some easy steps.
When you convert your personal Instagram account to a business account, you get access to a whole lot of new features. The most notable one is Instagram Insights, which is a special reports section that allows you to track how well your Instagram posts are doing.
In addition to that, you also get the option to create advertisements, set up a shop, add links to your stories, and also unlock the option that lets you schedule posts for the future.
Having these at your disposal will show you what works and what doesn’t when you get your most visitors, and how you should schedule your posts to make the most out of Instagram.
Post your art consistently.
The Instagram algorithm rewards you when you share content on the platform, as all social media platforms live and breathe on UGC (user-generated content). While you may not get as much benefit from consistent posting as you would from a platform like TikTok, ignoring the activity will be a perfect fast-track to failure.
To get the most out of Instagram, you should share a photo every day, at the very least. Sharing a video now and then also helps, but photos are easier to create and upload faster.
If you want to take a break from consistent posting, you can schedule a couple of images to upload on autopilot while you’re away. However, posting an image a day shouldn’t be tasking, especially if you’re using Instagram anyway.
Stay active in the art community.
Apart from actively posting to the platform, Instagram also rewards other kinds of activity on the platform. If you want your photos to gain traction, try interacting with other artists on the platform.
You can start by following artists that are slightly more popular than you are. Like their images, comment on them, and give nice feedback. Do this consistently for a few weeks, and you’ll start noticing an increase in your following.
The secret behind this Instagram strategy is simple. On Instagram, when a popular handle follows you, Instagram will start recommending you to people who it thinks might also be interested in following you.
If you act nicely to other artists on the platform and they follow you, Instagram is more likely to recommend you to their followers, who might also be interested in following you.
Summarily, Instagram encourages building natural relationships on the platform, and they will reward you for doing just that.
Use art related hashtags!
Yeah, I understand hashtags can be annoying, but as artists trying to gain some following on Instagram, it seems like we won’t be able to do without them.
If that question is dancing in your mind, the answer is yes, hashtags still work, even today! Choosing the best hashtags can be the difference between a viral post, and a post with four likes: you, your parents, and your dog.
While you shouldn’t invent arbitrary hashtags, it’s not recommended to use viral ones either. When you’re still trying to grow your Instagram following try using hashtags with around 5k to 100k posts. That way, you’ll have any hope that your post will show up amongst the top posts.
Get featured on art featuring accounts.
There are some accounts on Instagram with massive followings that specialize in promoting emerging artists. They’ll repost your art, linking back to your account to grow your following.
If you use the correct hashtags in your posts, some of these account handlers will contact you naturally. However, you may be required to pay to get featured on these art-sharing accounts.
If anyone is asking you to pay, it’s up to you to decide if you’re paying or not. If you’re paying, however, it’s important to check the genuineness of their followers using any of the online tools available for this purpose. These tools will show you if the followers are real people or just bots.
And that sums up marketing your art on Instagram. As I said earlier, lacking an Instagram account is an unforgivable sin for an artist, and with the tips up there, growing it will be pretty easy.
3. Start Blogging About Art
If you already have a website, you don’t need any extra investment to create a blog. You just have to push a few buttons and you can start sharing your art knowledge with the world.
There are so many advantages to blogging that you’ll wonder why you haven’t been blogging years ago. Apart from running paid ads, blogging is arguably the next best way to get your art noticed very quickly.
But just like every other item on this list, blogging to gain traction isn’t very easy. You have to be willing to learn a bunch of new stuff to blog successfully. Also, buying a new, more comfy keyboard will help, as you will be writing somewhat lengthy posts.
If you’ve never had any experience with blogging, here is how to drive visitors to your website by blogging, while trying to upsell your art at the same time.
Create your blog.
If your portfolio website is already on WordPress, there’s not much to do in this area. WordPress was technically created for blogging, so you should already have a blog area on your website.
However, you may want to let old and new visitors know that you now have a blog section on your website while providing clear directions on how to access it. Most times they just have to click a link to navigate to your blog, or it may even be right on the homepage.
If you’re using some other website builder or CMS, try googling how to embed a blog into a website on that CMS. While I’m not sure all website builders will let you create a blog, all that I know of do, and unless you haven’t been following this tutorial, you should be good.
If you want to learn to become a master blogger, then check out the guys over at Income School. They’ll show you how to get up and running. More importantly, they’ll teach you how to make money with your blog.
Research keywords.
If you’re new to blogging, it’s understandable that you may not know what keywords mean. However, without adequate knowledge of keywords, blogging can be described as a glorified waste of time.
A keyword is what people search on a search engine to get to various websites, and the practice of finding what words and phrases people type into Google the most is referred to as keyword research.
Keyword research shows you what to write about, so you don’t waste your time publishing editorials that nobody ever reads. The process of carrying out keyword research is all part of a larger process called SEO, which you’ll be hearing quite frequently in your blogging journey.
Target potential art buyers.
Most artists who also keep blogs tend to target their blogs towards other artists. While this isn’t necessarily wrong, it doesn’t directly affect your sales, unless you sell art supplies (which you can, indirectly).
When gathering keywords and potential topics for your blog posts try to think about what your ideal customer will want to learn about online. That is the kind of posts you should try publishing on your blog in the long run.
It certainly doesn’t hurt to target some of your posts at fellow artists; it’s recommended, as this can help you build better relationships with other artists, plus selling affiliate products also make you some extra cash.
Promote your art consistently.
If you’re trying to promote yourself using your blog, you must do so strategically. Showcase your artworks in your posts in a way that you don’t come across as uninteresting, and at the same time, your readers know what you’re offering.
For example, when trying to show examples using a painting, use your painting, with full attribution showing that you made the painting and you’re glad you did.
By promoting your artworks in this manner, you will receive many inquiries about the possibilities of acquiring your art. From there, you can offer your options, making you more art sales in the process.
Monetize your blog (optional).
If your blog is gaining a lot of traction, it will be quite wasteful to let all the readers come and go without making money on those that are uninterested in purchasing any of the products you’re offering.
There are many clever ways to monetize your blog traffic (visitors). One option is running ads. You can apply to become a Google AdSense publisher to get permission to run AdSense ads on your blog. There are many other ad networks like AdSense.
One I highly recommend is Ezoic. Through Ezoic, you’ll be able to place ads on your website that earn you money from each visitor. In my experience, you will earn much more money through Ezoic than you will using Adsense.
In addition to serving ads, you can also sell affiliate products for a commission. This will come in handy if you publish art-related tutorials.
4. Run Paid Ads to Your Art Website

This can easily pass as a subheading on any of the methods listed above, but it’s so important that it deserves its dedicated section. Most artists underestimate the power of paying for popularity on the internet.
As an artist, you have many options for running paid ads. You can run full-page newspaper or magazine ads or run ads to reach more people on Facebook, Twitter, Google, or Pinterest. Here is a breakdown of three of the paid ad options that most artists use and how they’re important.
Google Ads
Have you ever noticed that when you do a search using Google often times the very first returns on the search results page have the word “Ad” placed next to them? These are ads that people have paid to place there.
Using Google ads you can target specific segments of the population to make sure that your ad is appearing to certain people or when someone does a related search.
For instance, if you create art that is specific to a particular town or city you can have your ad show up only when someone searches for specific words, like “Art for sale in Seattle.”
Facebook Ads
Facebook Ads is next to Google Ads in the popularity charts and is a quite compelling way to get your art noticed. While Google Ads is naturally better for making sales, you’re an artist and not a salesman.
Your goal while running ads on Facebook should be to reach the maximum number of relevant people for the least possible cost. This takes some practice or an expert if you can afford it.
Pinterest Ads
If you’re looking to add another social media website to your paid ads strategy, Pinterest appears to be a much better option than anything else out there.
Pinterest is optimized for images, so you should have no problems showing off your art. Also, you can choose where a user gets directed to when they click on a Pinterest ad. While we recommend directing them to your website, you can direct them to your Instagram handle, Artstation account, or Etsy shop.
If you mix all of these art promotion tactics perfectly, your art should start exploding in popularity to the point where you start finding it difficult to track all customer orders.
