What Is Foreshortening In Art? (Explained in Detail)
While foreshortening may be a term unheard of to an amateur artist or sometimes even a seasoned one, it is an old drawing practice that dates back to the renaissance period, first used by renaissance artists in Florence and Padua.
Since you’re here, it’s safe to assume you’re wondering, “what is foreshortening in art?”
Lucky for you, this article will help you understand foreshortening and lays out everything you need to know about its origin, types, as well as the many foreshortening techniques.
Read on to learn how to practice foreshortening and incorporate it into your art.
What Is Foreshortening In Art?

(This article may contain affiliate links and I may earn a commission if you make a purchase)
Flickr Image by TibberProductions
To put it simply, foreshortening is an artistic technique that enables you to depict different perspectives accurately. The foreshortening technique allows an object in a two-dimensional painting or drawing to appear to extend into space (3-dimensional space).
Foreshortening techniques allow you to create depth and portray how objects recede as they move farther in the distance.
A foreshortened figure— whether it’s the human body, landscapes, buildings, or simple shapes, facilitates you in drawing illustrations that appear more realistic and add three-dimensionality.
To achieve this, the object is drawn to appear shorter than its actual length to make it seem compressed.
It Helps To Visualize Foreshortening
If you’re still having trouble understanding foreshortening, don’t worry, the following exercise will help you picture how it’s done.
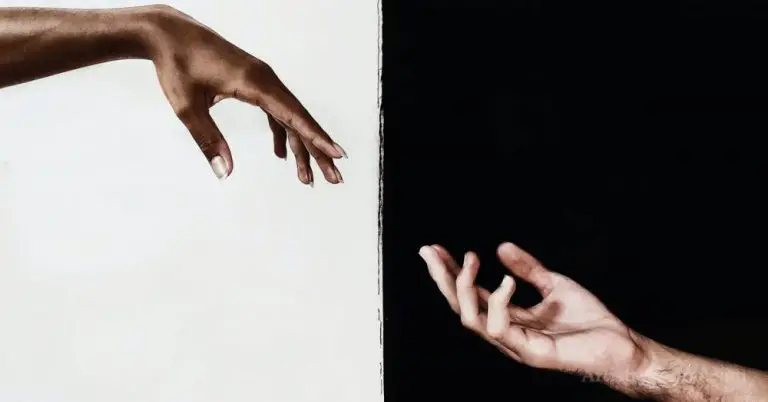
- Stretch your arm in front of you, bending your elbow at a 90-degree angle and aligning your forearm with your chest.
- Observe the length of your forearm in this perspective, from the elbow right down to the fingertips. What you’re seeing is known as limited foreshortening.
- Next, extend your arm out in front of your body; notice how it appears to be longer in length?
- What you’re seeing now is not the actual length of your hand; it is only the perceived distance thanks to extreme foreshortening.
Every Three Dimensional Drawing Involves Foreshortening
If you’ve ever drawn an object in a two-dimensional space, you have already used foreshortening techniques to some degree, whether you’re aware of it.
In Landscape Drawing
For instance, think back to the last time you saw or painted a landscape with a flat road lined with trees.
The illusion of trees becoming shorter the further away they are or the road’s two edges converging into the distance are great examples of foreshortening.
In Figure Drawing
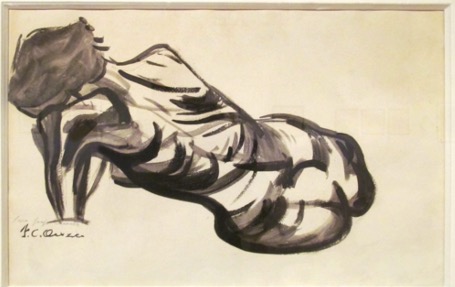
When composing and drawing the human form using foreshortening techniques, the human anatomy and its proportions are manipulated to add realism.
Imagine a person laid out on their back, feet pointed towards you.
To accurately convey the position in relation to the picture plane and communicate depth, you will have to draw the feet much larger than the head.
Foreshortening: Origin and Rise in Popularity

Artists from the early renaissance period first conceived and practiced the process called foreshortening.
Early Renaissance Art
Among the pioneers of this technique are Andrea Mantegna, Vincenzo Foppa, and Paolo Uccello.
Mantegna’s Di Sotto In Su (1465-74) and Lamentation of Christ (1480) signify the first use of foreshortened figure drawing.
In the Lamentation, Christ’s chest and legs are drawn shorter. But, on the other hand, Christ’s head is considerably bigger to create depth.
Luca Signorelli, a contemporary of Mantegna’s, is another revered renaissance artist credited with the first use of this technique, as can be seen in his Last Judgement frescos (1499-1503).
High Renaissance Art
Michelangelo’s Frescoes, particularly The Separation of Light from Darkness, use the foreshortening technique of god’s body to create the illusion of god rising above the observer.
Correggio, after Michelangelo, was another great painter who employed foreshortening to create drama in his art. One example is his most well-known work: Assumption of the Virgin (1526-30).
Paolo Veronese’s murals for the Marciana Library and Doge’s Palace are testament to his prowess as a master of foreshortening.
Post-Renaissance Art
In his work A Supine Male Nude (c. 1799–1805), Joseph Mallord William Turner shows another masterful depiction of perspective that can be achieved using foreshortening, even if the mediums are as simple as chalk on paper.
Effects You Can Create Using Foreshortening
The effects achievable by incorporating most artistic techniques differ based on how much you use; the same is true for foreshortening.
However, there are some direct effects you will observe with even the most basic use of foreshortening:
- Basic shapes, parts of the human body, landscape elements, etc., will appear shorter than they are.
- As the viewer, you’ll see objects closer to you, and those farther from you create overlapping shapes.
- The more distant an object recedes into the background, the smaller it’ll appear.
Foreshortening techniques draw upon mathematical foundations, but these intricacies are of little relevance to an artist.
The perfectionist in you may be compelled to work out the right angles and composition for perfect foreshortening, but painstakingly learning the mathematics involved does not play a significant role in mastering foreshortening.
You’re good to go as long as the composition looks right to the eye!
Learning Foreshortening
Before you start practicing, it is essential to consider what objects you wish to draw using foreshortening techniques; the object determines the method.
Trying out all the common types is an excellent place to start to find foreshortening techniques that work for you.
As you continue to learn to foreshorten, you’ll be able to mold the artistic technique to your unique style.
Try out all the options available, mix and match techniques, and find the right type for you in no time!
Important Considerations
Before discussing the many foreshortening techniques at your disposal, let’s go over a few things to be mindful of.
Come back to this list throughout your journey to master the techniques quickly and at a quicker pace than you would otherwise.
Tip One: Pay Attention To Space
Remember: whatever it is you’re drawing, it exists within space.
This means the position of the objects is relative to the viewer as well as other objects in the painting.
So is it moving toward you or away from you?
Which components are closer to you, and which are distant?
What is the distance between you and the object?
Being mindful of these vital considerations will make learning to foreshorten all the more simple.
Tip Two: Use Perspective Lines
They make your work easier.
Extending away from a point on the horizon, perspective lines enable you to determine the relative size of objects to one another and their surroundings as they become distant.
Tip Three: Look For Shapes That Overlap
Use foundational overlapping shapes as a baseline for your drawing.
Breaking down the subject of the painting into basic shapes is the quickest route to perfecting foreshortening in art.
Tip Four: Imagine Your Subject Is See-Through
Draw the main element as if it is transparent.
To elaborate, it means drawing the object like a cube in a three-dimensional space, which will allow you to visualize how your form comes together as a whole and lies in your picture plane.
Tip Five: Pay Attention to Outlines
Keep an eye out for the prominent edges and contours of your form.
Some edges need more definition, while others look softer from a certain perspective.
It is good practice to decide which contours require more detail and emphasis to make your foreshortening as effective as possible.
Tip Six: Maintain Flow
While breaking down objects into simple shapes is necessary, always ensure that these shapes do not break your continuity.
Tip Seven: Experiment
Lastly, adapt foreshortening types to your art style.
This can be done by either exaggerating or understating this artistic technique in your art.
Understating foreshortening in your art will help you achieve a flat, often playful, and cartoon-like look.
Overstating foreshortening in your art will add drama to your work.
Foreshortening In A Figure Drawing
Human anatomy is undoubtedly among the most complex of forms to draw. The slightest mistake can be glaringly obvious.
Adding to this already challenging work is drawing a human body from different perspectives.
But it doesn’t have to be this complex.
Incorporating foreshortening to draw realistic bodies with the right proportions can make creating art hassle-free.
Let’s go over the three standard methods of foreshortening the human form.
Foreshortening Human Figures Using The Four-Step Approach
If your drawing includes a sharp angle, it is imperative to understand how perspective distortion will affect lines.
Follow the steps below when you practice foreshortening to perfect representing the human figure.
Step One: Visually Measure Your Subject
To start, visually gauge the height according to perspective. The measurements need not be perfect, as long as they help you understand where the figure lies in space.
Depending on your perspective, draw a curved or angular line from your figure’s head to the feet. This ensures that the subject will fit within the image plane. It also acts as a guideline for other proportions.
Step Two: Map Out the Remaining Proportions
In this step, draw additional lines to determine the rest of the proportions of your figure. Finally, add lines to indicate the shoulders and waist of your subject based on your viewing angle.
You may draw these lines with a slight curvature. However, make sure the line indicating the shoulders is significantly longer than the one showing the waist.
Step Three: Draw a Stick Figure
Yes, you read that right.
In step three, start connecting the lines you sketched in the previous steps to flesh out the subject.
Next, sketch new lines to follow the limbs of your figure.
Think of it as drawing the skeleton of the human body. Make use of geometric shapes instead of straight lines to outline the torso. Geometric shapes can also be used for hands and feet.
Using shapes as opposed to lines provides a better structure for step four.
Step Four: Flesh Out Your Figure
By the time you get to the last step, you’ve done most of the complicated work already.
Now it’s time for you to start fleshing out the skeletal structure in front of you.
Start by drawing contour lines. In this step, you have the freedom to go as heavy-handed as you’d like or flesh your figure out as little as possible. It’s entirely your call!
This step is also where you draw clothes and other complex details on your figure.
Continue to add or retract foreshortening until you are satisfied with the final sketch.
The four-step approach is an excellent way to grasp the perspective and proportions of the human form. You’ll be drawing impressive foreshortened art without much effort with regular practice.
Foreshortening Figures Using Geometric Shapes
The main difference between the four-step method and the geometry technique is that the latter represents the form as shapes instead of using lines.
Breaking down bodies into geometric shapes is a fantastic way to get familiar with the human form and makes foreshortening much more effective.
There isn’t a set of rules or particular guidelines for this technique.
Simply learn to observe forms and figures and visualize them as distinct shapes.
Depending on the size of your figure and the viewer’s perspective, the shapes you draw will vary from subject to subject.
One critical part of this approach is to learn how simple geometric shapes come together to form a whole.
Once you break down forms into shapes, fleshing out the foreshortened object becomes as simple as refining the edges.
Foreshortening Figures Using The Coil Technique
Also known as the spiral method, this approach is a tad messier than the others preceding it, but that isn’t to say it’s not practical.
In this approach, you draw your figure through concentric coils that follow the human body’s natural contours.
This method differs from the other two in that it starts with three-dimensionality right off the bat instead of first mapping out two-dimensional structures.
The coils you sketch for horizontal and vertical body parts should appear flat; as the parts move toward the viewer, coils turn into tight circles. This way, mapping the form as it morphs becomes quite compelling.
Because of its messiness, the coil technique will require quite smoothing out and cleaning up.
Foreshortening Landscapes
Generally, foreshortening in landscape art is much less complicated. Artists’ most prominent challenge is creating foreshortened drawings that retain realism and create depth.
Common examples of foreshortened landscapes include:
- A river winding away
- A straight road whose two edges appear to meet in the distance
- Tree branches extending toward or away from your vantage point
- A fallen tree
- Waves crashing on shore from an extreme angle
One Point Perspective
This perspective involves using one vanishing point to mimic a sense of depth in the artwork.
The one-point perspective requires you to assume the planes of the subject facing the viewer have no depth.
As perspective lines move away from the viewer’s vantage point toward the vanishing point on the horizon, depth is created.
What Is Foreshortening In Art – Summary
While foreshortening in art may be a term that’s new to you, this technique has been widely used in art worldwide and throughout modern history. It is instrumental in creating depth in imagery and conveying realism.
When foreshortened, objects shrink as they move farther from the viewer. As this happens, shapes become compressed and begin to overlap.
Depending on your style, the extent to which you incorporate foreshortening in art is up to you.
Experiment with all the types available to you to find out what works for you. Remember: the best way to perfect foreshortening is by diligently practicing your choice technique.


