How To Make Moss Wall Art: A Step By Step Tutorial
Cultivating greenspaces is a labor of love many artists and non-artists indulge in these days.
For any avid plantsman, having fresh houseplants isn’t only great for livening up the home and the many ways in which they improve health and well-being.
You may already have an array of indoor plants decorating your home or office.
You may even identify as a plant parent.
But what if we told you your urban jungle could be ramped up without adding more living plants?
This is your sign to try your hand at moss wall art!
What Exactly Is Moss Wall Art, You Ask?

(This article may contain affiliate links and I may earn a commission if you make a purchase)
https://creativecommons.org/licenses/by-sa/2.0/
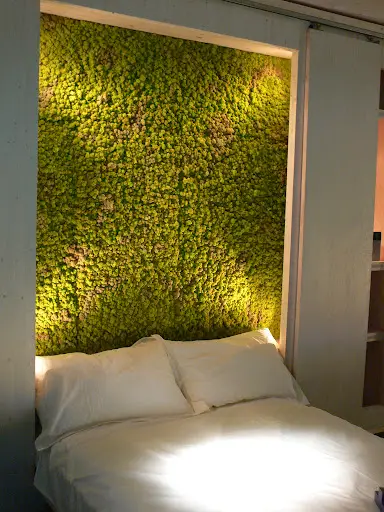
Moss wall art is a relatively new and unique art style that helps you add greenery to your environment without taking up much space— it goes up on virtually any wall in your home or office and brings a little bit of nature home.
The three most common types of moss wall art are:
- Living moss walls
- Artificial moss wall art
- Preserved moss wall art
Living Moss Walls
Living moss walls are usually better for the outdoors since they often contain other plants better predisposed to display outdoors.
Not to mention their maintenance is time-consuming and expensive if done indoors.
Artificial Moss Wall
When budget is a concern, many people might be tempted to opt for artificial moss for their wall art.
However, it is essential to remind oneself that while artificial moss might be cheap, it also looks cheap.
Moreover, it does not offer any health and cognitive benefits of having natural plants around you.
Preserved Moss Wall
Preserved moss wall art gives you the best of both worlds!
It doesn’t live and breathe like living moss walls, so upkeep is minimal, other than an occasional dusting.
On top of that, it looks and feels exactly like natural moss.
So while living moss walls will last a long time with careful maintenance, preserved moss will last you a lifetime without ever needing any ongoing care!
Now you may be asking how to make moss wall art?
Don’t worry. We’ve got you covered.
Read on to discover how you can DIY moss wall art for your home or workspace.
This project may seem intimidating at first but rest assured, you can easily pull it off without needing a lot of plant knowledge.
Here’s Everything You’ll Need To Make Moss Wall Art

Before we get crafty, let’s go over a list of all the tools you’ll need to create your wall art.
Something To Put Your Moss Into
Your moss needs to go somewhere, and the best way to hold your moss is by using a frame.
The type of frame doesn’t matter.
You can buy a new frame from the store or get it second-hand from a thrift store.
Or better yet, you can repurpose old art pieces that don’t excite you anymore.
Something To Stick Your Moss Onto
Next, you’ll need some boards, any boards, to go into the frame.
These boards are what you’ll be glueing your moss onto.
We suggest getting foam board or cardboard for this project— and extra points if you recycle!
Something To Hold Your Moss In Place
You probably saw this one coming.
To make sure your moss stays in place, you’ll need glue.
A glue gun, to be specific. It makes your work more manageable and less messy, and the hot glue works wonders once it cools down, cementing your moss in place.
Something To Cut And Carve
Creating moss art includes many cutting shapes and smaller pieces for the art to come together.
And since you’ll be cutting shapes out of your board, it’s good to have a box cutter or an Exacto knife on hand.
Any sharp blade will work- the sharper, the better.
Something To Draw Shapes With
You’ll need a pencil or a pen to sketch out the shapes you want your moss art to take.
Something To Clean Up With
A pair of scissors will be helpful when you need to trim the edges of your moss and give your wall art some final touches.
Something To Hang Your Art Up With
You’ll need some picture wire and picture hangers to display your work proudly on any wall in your space as a sign of your hard work and artistic ability.
Something To Protect
Make sure you have a pair of gloves to keep yourself safe since this project does include working with sharp tools.
A cutting board is another tool you’ll want to use if you wish your tabletops to remain scratch-free.
Some Preserved Moss
And most importantly, you need moss!
You can use many kinds of moss for wall art, such as pincushion moss, ferns or jungle moss, etc.
We suggest using a mix of reindeer and sheet moss for this project.
You can find preserved reindeer moss here on Amazon.com.
Now that you know what you need, it’s time to get into how to make moss wall art.
Let’s Get Started Making Moss Wall Art

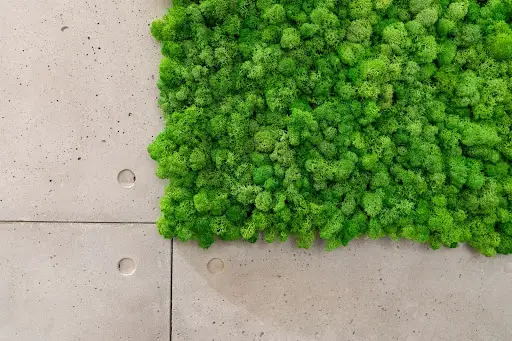
Rock wall photo created by wirestock
Gather all the tools you need, and we can get started on your unique art piece.
Step 1: Sketch Outlines
Begin by sketching out shapes and patterns onto your board because these shapes, when layered, will give your piece depth and make it pop.
Have fun with the outlines and go wild with the patterns.
Repeat Step 1 multiple times to get as many layers as you want.
Step 2: Cut Out Shapes
Once you have all your shapes, it’s time to take your sharp tool and follow along with the outlines.
Pro tip: the sharper your tool, the easier it will be to cut your board.
And make sure you don’t throw out any of the extra pieces; all pieces will go on the board to build around the center.
Step 3: Visualize The Layout
Now that you have your shapes bring in the frame and start placing your pieces on its back panel.
Stack your pieces in multiple ways until you find the layout that looks best to you.
Once you find your perfect build, a good tip is to number all the pieces, so you know exactly what goes where by numbering your shapes from the bottom up.
Step 4: Start Building
Start by glueing sheet moss directly onto the frame’s back panel.
Next, start building your frame by glueing the board pieces according to the number.
Once the pieces are stuck on, now is the time to fill in the frame with moss.
Step 5: Final Touches
You’re almost there!
After glueing your moss where you want it, all you need is to trim the edges from the sides with a pair of scissors.
Your beautifully unique art piece is ready to go up on any wall around you.
How To Make Moss Wall Art – Key Takeaways
Making preserved most wall pieces is a great way to add to your collection of indoor plants without adding more maintenance and upkeep to your plate.
Everything you need for this DIY you can find at home, except for moss.
They have numerous benefits for your mental and physical health, and they are guaranteed to be the focus of interest next time you have guests over!

