How To Make String Art: A Comprehensive Guide
If you have been around on the web for a while, you may have seen string art pop up on at least one of your social media pages. A simple search on Google, Pinterest, or Youtube will take you to any good DIY string art tutorial.
These tutorials on making string art are chock-full of instructions and tips and tricks to help you create your string art. This article consolidates the best advice from all over the web so that you can get started on your personalized string art project today!
And don’t worry; while this project may seem daunting now, you will soon discover that DIY string art is fairly easy, not to mention incredibly fun to make and versatile, i.e., you can make it with any pattern of your choice.
So get your crafting hat on, and dive into your next DIY art project.
(This article may contain affiliate links and I may earn a commission if you make a purchase)
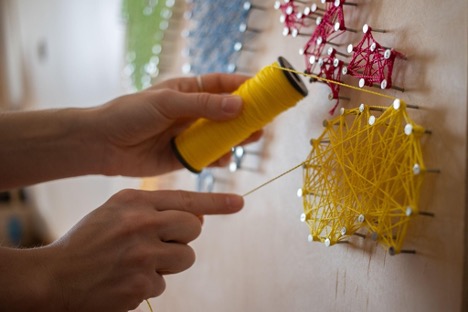
Photo Pexels.com
A Brief Introduction To String Art
You may be compelled to think string art is a relatively newer art form given its rise in popularity in recent years, so you will be surprised to learn that string art dates as far back as the 1800s. It was introduced by a British Mathematician named Mary Everest Boole— often credited as the mother of string art. She pioneered this art form to make mathematics more accessible to young children, particularly young girls.
Mary was a proponent of using natural materials and easy projects to engage children in learning math. She taught kids how to stitch and tie strings into mesmerizing shapes via parabolic angles.
This evolved into string art as we know it today, a child-friendly arts and crafts activity suitable for any skill level and a source of self-expression through patterns and designs.
Making String Art: Important Considerations

Before starting your string art project, you must make a few critical decisions.
What Will Your Backdrop Be
You can use many materials as the background of your string art. Any type will do as long as the material is solid and sturdy. The most commonly used board materials include stained wood, and if you are not a fan of cutting wood and hammering, then a corkboard is the way to go. For someone just starting with art and crafts, or a younger artist, softwood or foam board are some other great options.
What Color Thread Or String Will You Use
It is prudent to decide beforehand what color of thread you wish to use for your string art project. You can always make string art with only one color, but using multicolored thread is a great way to add oomph to your project.
What Thickness Is Best For You
If you have decided to use multicolored string, here are some options to look into.
Embroidery Thread
For fun string art with multicolored string, consider using embroidery threads to take your art project to the next level, thanks to their sheen.
Crochet Thread
Another great option of string you can use is crochet thread, which is finer than embroidery thread.
Embroidery floss
However, if you are inclined to use a thicker string, perhaps you would like to use embroidery floss, which has six strands of thread spun together.
Supplies You Need For Your String Art Project
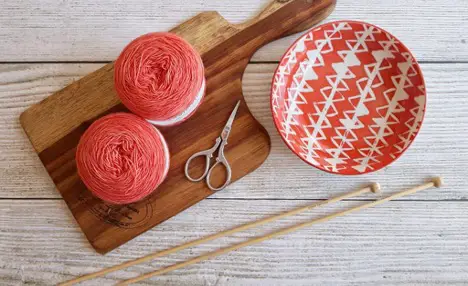
Photo Pexels.com
Here is a quick rundown of everything you need to create string art.
A Pattern And Materials To Trace It On
For the first step of your project, you need to have a pattern. You can pick anything: from maps to words, animals to plants, abstract art or geometric patterns, and so much more.
Even if you don’t have a particular pattern in mind, you can draw the most basic shapes by hand. Or better yet— you will find an array of string art patterns online; just pick a paper pattern of your liking, and get to work!
Next, you need to choose what material you will be outlining your shape on. You are free to use a plain piece of paper if you want, but we suggest making your work easier by using dedicated mediums such as tracing paper. If you don’t have tracing paper on hand and don’t wish to shell out on some, you can always use some tissue paper.
A Hammer and Some Nails Or Pins
You will likely find all the hardware tools required for this project in your garage or tool shed.
However, depending on the type of thread you plan to use, you will need particular nails; the thicker the string, the bigger the nail head. We suggest taking a trip to the hardware store and buying some 7/8″ 17 gauge wire nails or linoleum nails.
You must gauge the number of nails you will need based on the size of your shape.
However, if you are working with a child on this DIY project, or you would rather just avoid all the fuss with hammering, using pins, such as thumbtacks, is an alternative you may like. Pushpins are especially a great option if the shapes you are working with are basic.
Just make sure you get the plastic tips and the pins with flat steel ones. Instead of stringing the string around the stem of the pin, as you would with nails, tie the string around the cylindrical plastic head of the pin. The results will be the same for both methods.
Lastly, if you wish to hang your string art up on a wall, pick up some hanging hardware from the hardware store while you are down there.
Miscellaneous Tools That Come In Handy For Making String Art
Other items that are essential for your DIY string art include:
- Drawing Utensils: a pencil, pen, or Sharpie to trace the outline of your pattern onto your choice of paper.
- Tape: Of course, you will also need tape. You can use pretty much any type, as long as it can hold your traced shape down on your board. Our top suggestions include masking tape, double-sided tape, duct tape, or even washi tape.
- Glue: you will need this when you secure the ends of the thread; feel free to use any glue you have on hand— whether it is hot glue, tacky glue, or super glue, anything works!
- A ruler: to measure your board and template
- A pair of scissors: regular scissors to cut your pattern out and smaller ones to trim the thread
- Tweezers: when you start to tear away the paper from underneath the nails, small spots of paper will be left where the nail is hammered into the backdrop; use tweezers to delicately remove the leftover areas of your page
- Paint and Paint Brushes: to decorate your board
- Needle nose pliers: in case any nails need removal or rearranging
A Step By Step DIY String Art Tutorial
Now that you have everything you need on hand let’s get started.
Step 1: Prepare Your Pattern
In the first step of your DIY string art project, you need to take your tracing paper and outline the edges of your shape onto the paper. This will give you your paper template.
Take the page with your pattern and tape it to the tracing paper to make tracing easier. Moreover, to get neat edges and avoid unnecessary mess, go over the outline with a pencil before going in with a pen or Sharpie. This is especially essential if your pattern has intricate borders.
Step 2: Attach Paper Template To The Board
Optional: If you are using a piece of wood for your string art and you wish to stain it, or if you would like to paint your panel/board, do so before you tape your pattern to them. Once you have traced out the pattern on your paper, begin cutting along the outline. After cutting, take any tape of liking and stick the pattern down on your board to secure it in place.
After your pattern is where it needs to be, create 1/2 inch or 1 cm marks along the edges of your pattern to act as markers for the nails. This is only advised for easier patterns, however. If your design is more intricate, you will be better off free-handing the nail placement.
Step 3: Begin Hammering Nails Into Your Board
Carefully hammer the nails on the markings you created in the previous step. Use each mark as a guideline and ensure you are hammering the nails as perpendicular to the piece of wood as possible. Hammer the nails down far enough into the board to be secure but still have enough of the nail tips sticking out to wrap your string around.
Caution: if this is your first time hammering nails, or it is just one of those things you are not great at, find someone else to do the hammering for you. If that is not possible, take it slow and steady because the last thing you want out of this fun project is a set of injured fingers.
Once every nail is in place and you can see the outline of your string art, begin to pull the pattern away gently. As you pull, the pattern may tear, but don’t worry. You no longer need the template anyway. Pro tip: use a tweezer to pull off the pieces of paper that stay stuck around the nails.
Step 4: Begin Stringing
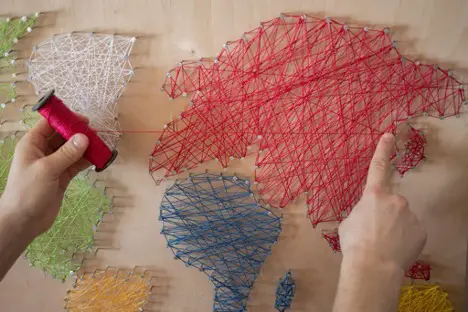
Photo Pexels.com
The most exciting part of this DIY string art tutorial is finally here: you get to begin stringing around each nail in your pattern. Don’t put too much thought into what should be your starting point. Start at whichever nail you want.
Before you start to wrap the string, tie a knot to the first nail and add some glue. Wait for the glue to dry because that end of your string will not budge, and you can confidently start stringing once dry.
There is no right or wrong way to string; just move from nail to nail, and your pattern will eventually come together just the same. And the best part? If you don’t like how it turns out, or if you make a mistake, you can unwind your string art and start over!
Remember that the string must wrap around each nail at least once; after the first wrap, you can come back to each nail multiple times, depending on how dense your string art looks. When you are finished, and your string art seems to be turning out just as you pictured, tie off any loose ends and glue them to a nail for extra security. Trim any extra string, and voila! You are all done!
How To Make String Art – A Quick Recap
String art is one of the best DIY projects you can try at home, with the materials you already have, without needing any artistic prowess. You can try your hand at string art, starting with simpler shapes, then once you get the hang of it, moving on to more complicated ones.
As you get better, this can become a great project to create with the whole family; It’s fun and easy, and the end product is bound to be pleasing!
You need a board of your choice, a pencil or pen, some string, nails or pins, and images of your favorite things. It’s as easy as ABC!
Once you have your supplies ready, all that’s left to do is:
- Print your shape or draw it by hand
- Trace outlines of your shape
- Paint the backdrop if you prefer
- Stick your pattern onto the board
- Mark the border and hammer the nails into your backdrop (or fasten your pins on your backdrop if you are not using nails)
- Pull away the paper template from underneath the nails
- String through all the nails on your panel
- Tie the ends and glue them down; trim any access string
And with that you have your fascinating new art piece ready to be displayed!
